Sunday, February 3, 2013

Sew Sew Modern Swap

I have to admit that when our swap first began I was a bit intimidated by all this talk about people wanting the weekender bag.  When the premise of the group was one large item and a small item, and I reviewed the examples given by the mama's I thought NO PROBLEM... but the girls began talking about the Weekender Travel Bag

Weekender Travel Bag - Patterns by Amy Butler

I thought the Weekender was a bit much to be asking for.  Well, it turns out that no one was asking for it...it was just a conversational thread about the bag and how they loved it.  So I got my panties in a wad all on my own.  LOL

I saw some really neat quilt as you go versions of the bag and fell in love...instantly.  So I ordered the pattern.  Once I received the pattern and opened it up I immediately FREAKED OUT!  What was I thinking!?!!  There are two pages..not small pages but BIG pages of instructions..which after I settled down, I became grateful for.  The instructions are pretty good.  I did make some changes.... I used my Pellon Fusible Fleece that I use for totes and pouches, 986F  (You can purchase that  for a decent price at JoAnns if you wait for a coupon it's a steal of a deal!  My sister and I bought a bolt and split the cost.) instead of all the interfacing's that she used.  It gave the bag more softness and not a stiff suitcase appearance.   My zipper was 2" shorter which keeps you from having to dig into the side pockets for the zipper pull.... I just modified the zipper insertion by an inch on either side... I didn't have this brilliance on my own...no, not at all.  I asked the girls at JoAnns... heck, I didn't even know what a separating zipper was!  LOL  Those girls were a wonderful resource.. I am thankful to them!

I also made my straps much longer so you can easily carry the bag over your shoulder. I did get my partner's feedback first to see if longer was what she wanted.

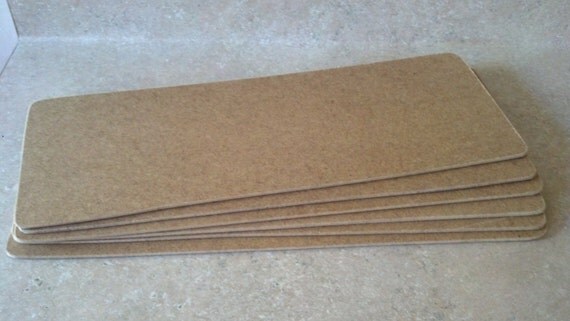
The pattern calls for you to use template plastic for the false bottom... I didn't have any and that seemed like it would be a bit flimsy so I cut a piece of thick cardboard to size and created a batting sleeve (this is in the directions) and then put my false bottom lining fabric around it.  It was pretty.  I really liked it.  As I was searching a for the pattern link (on Etsy) I came across this ...  masonite precut for the weekender bag.  How awesome!  Very sturdy and if you wanted to make it a permanent bottom you could add feet!

Masonite Weekender Bag Bottom Insert

Well, enough jibber jabber!  Here are some pics of my version of the Weekender Bag:

Finished Weekender posing with the journal cover I made for my Sew Sew Modern Swap partner.

Side view of weekender.

Inside view of the large front pocket.

Inside view of the side pocket.

Inside the bag showing the lining without the false bottom in place.

Inside the bag with false bottom in place.

The zipper... to the right is a sneak of the directions... tiny print! Wear your glasses!!
The bag does take some time to construct but it is sooooo worth it. Once you make the lining for the bag you hand sew it into place...  I have never made piping before or even used it so this was a first.   Putting in a hidden zipper was also a first for me.... I do believe the next time I make this bag, and I will, I will make my straps thicker so they rest more comfortably on my shoulders.  

My partner received her parcel yesterday and she loved it!  She has a wonderful blog called Pile O'Fabric.  You just have to go check it out.  She is currently hosting a Skill Builder, which of course, I am behind on... so I better get crackin'  !! 

Here's to happy sewing!!


Friday, November 2, 2012

Mouthy Stitches 2

I just love the Mouthy Stitches girls!  I fit right in.... we are verbal but in the most encouraging of ways.  There is so much activity that goes on and yes, it can be a bit overwhelming to keep up with all the posts that are made, but the one thing that is always in an overabundance is the inspiration.

This year my secret partner was May of Confessions of a Fabraholic .  Can you imagine how excited I was to see that she had actually saved the picture of her tote bag as a favorite!  She doesn't even know that this is for her!  LOL

Soooooo,  without further ado, I will show you some pic's of the tote bag and key fob that I made for her:

The Back....that big red square is a pocket.

The inside contains a key fob holder and another pocket that is perfect for holding a cell phone!

The front with the little key fob.

Here is my wonky key fob up close!
Something I need to work on is my photography skills!  These, of course, are taken at night and the lighting from inside does love to cast it's little shadows.   Some day, some day.

Until next time, my lovelies, keep on sewing or doing whatever brings you happiness!

Much love!


Sunday, October 28, 2012

Table Top Swap 3

Even though this is the third table top swap, it is my first time participating. I had a lot of fun, as usual, in stalking my partner.  It was my first time making fabric baskets and these cool pencil holders.

I love the one I made and for whom I made it for... Gina of Happy Go Lizzie.  She was a joy to make for.

Here is her basket that I made:


The movie wasn't included...lol... it is what I watched while making the baskets.  It is my all-time favorite chick flick!

Below is the basket I received from Deb, aka TrioStitchStudio:


I know that photo is pretty icky, but the product is NOT!  It is beautiful and I was so excited to receive it.  I have this secret love affair for ric-rac! And look at the owl!!!

My sister and I also volunteered to be Angels in this swap.  And we were fortunate enough to be called to active duty!  Nothing makes a heart feel better than making something nice for someone.  This gal loved 30's fabric an only wanted the pencil cases. I happened to have a bit in my stash from a project I had started (notice I didn't say finished) hehe  I was able to make these beauties with it.  Well, lets say, I made the baskets. My sis made the coordinating mug rug.  

I hope she loves them!  The smaller one is the perfect size for seam rippers!  lol  You can never have enough of those!

Until the next post (I actually have it scheduled to post but want to make sure my partner receives her tote bag before I actually post it!), my lovelies!!
Have a fantastic rest of your day!

Much Love!!

Saturday, October 27, 2012

FNSI

     FINALLY!   I have had time to participate in the Friday Night Sew In.  It has been moons since  I have gotten to "play" with the girls.  Earlier this week I was going through my sewing room closet and found some Halloween projects as well as some kits that I had purchased/started making many (eh-hem, pardon me while I clear my throat) YEARS ago.

     I have had this lovely in the works for only a couple of years.  All I had left to do, as I had started working on this again earlier in the week, was to hand sew the binding on the back of the quilt. Now it is complete and hanging on my wall in the living room just in time for Halloween!


     Last year I had purchased this lovely little kit and pattern called "Half to Have My Sister" by Bloomin Minds.  I added the borders to this and then layered the batting.  Next is to stitch down the applique, and embroider the phrase "sometimes I miss my sister".    This little wall-hanging really makes me laugh.  I was telling a girl at work about it but she didn't get the connection between the phrase and the witches legs....  So I had to explain it to her not once, not twice, not even three times!  By the fourth time, she finally got it.  But by then it wasn't funny.  


     I digress, as I was too tired to sew anymore and not wanting to rip out seams like my sister did (hehe) I  picked out some fabric for a Christmas pillow I want to make.  It has this lovely embroidery in the center which will go on the white fabric, followed by the red ric-rac then the aqua border, and the red striped  fabric(cut on bias) is the piping.
The pattern is #411 Vintage Candy Cane Snowman by Crab*apple Hill

      Another project, which cannot be counted in the FNSI because I finished it earlier this week,  was as stitchery unearthed from its fabric grave.  I just thought it was to stinkin' cute not to share with you.  All I had to do to finish this fright of a pillow was stitch around the applique and finish the door to the house. Then I added borders and made an envelope pillow cover with it.  Since my measurements were a bit off, which is really par for the course.. I made lemonade!  LOL  I had a creative opportunity presenting itself and I ran with it.  A loooooong time ago I had heard how to make your own pillow forms and had purchased the materials, which like a lot of my projects, were sitting in my closet and I did just that.  I will have to blog about that later,  but the pillow form with the new spooktacular pillow cover turned out beautifully and I wonder why it took so long for me to finish this.

I got this stitchery pattern from a little booklet. I will have to scrounge to find it so I can give you the info.
So that is all for this Friday Night Sew In blog post!  I hope you all have a wonderful weekend.  I am off to take a shower and tidy up a bit.  I have to find a fun dish to take to my step-sister, Becky's, tonight.  She is having a Halloween party!  Kid friendly, course!   BoooOOOOaaahhhhaaa

Friday, October 19, 2012

Belated swap posts! Part One


Time sure flies, doesn't it!  I have been busy doing everything and nothing all at the same time!
I have participated in a couple swaps recently and received some wonderful items.  There has been the Pretty Little Pouch Swap 5 (PLPS5) in which I received this great pouch and goodies:


Thanks, Jill!!  (JMCBroom)  I adore this!
 Here is the pouch I made her with the goodies:


I appliqued the flowers and the lady bugs onto the lining of the pouch. I loved that idea. She will be the only one able to appreciate it!

From the PLPS 4 swap I received this beauty:
pouch back
pouch front

Thank you, Sara!!!!  (simplybeu)  LOVE IT!


Here is the pouch I made with its goodies for my PLPS4 swap partner Wambers Whimsies (Amber)  
The back...before I ripped it all apart and added hardware and fixed the zipper
corners.


So...... this is it for tonight!  I have more to post but this one is long enough.  LOL  Two more swaps to tell you about plus ones that I am getting ready to particpate in!

EDIT:   I just realized that the last two pouches I had already blogged about! Sorry for the repeat!  It's old-timers, I swear!

Saturday, August 18, 2012

Pretty Little Pouch Swap 4


I am getting ready to start round 5 of the Pretty Little Pouch Swap and I realized
that I have yet to post my pouch from round 4.    I really liked the body of the pouch but my wristlet looked like it was on Viagra and the zipper ends just looked horrible.  I made a quick call out to my handy side-kick, Mr. seam ripper, and a rippin' we went!

I took apart the entire pouch and reassembled it into a pouch that I would be proud to have my name associated with.   I did not have a pattern for this and just kind of made it up as I went along.  

                                                      BEFORE
                                                       front of pouch    

Back of pouch


Inside the pouch I added a divider and pocket the was also divided.  Just the perfect size for placing your drivers license and credit card.  

Remeber that ugly zipper finish I was telling you about....... here it is upclose and personal:


After adding some hardware to my wristlet and  making some adjustments for the zipper, I had a lovely pouch...   I also made a cathedral window pincushion, threw in a charm pack and other goodies and mailed my pouch off to my partner.  I think she really liked it!


The pouch that I received was lovely. Lots and lots of french knots big bold pattern ... not really my style or anything that I had indicated that I liked but that is the great part of being in swaps..you get to meet all kinds of creative geniuses who expose you to beauty outside your box.  I love knowing that she spent so much time making this pouch that her hands made every single knot.  I can picture her sitting in her chair working on the pouch.  She made it beautiful.  


 So this is my pouch...her hands.. I took the pictures off Flickr... I just purchased a new camera and still have to learn how to use it.  She also sent me some cool fabric earrings and some note cards...  A very lovely swap for me!!!

Until next time my lovelies, have the most blessed day!!!!!


Sunday, March 25, 2012

Quilts for Kids--The Asterisk Quilt


My most recent contribution to Sarah from SewSarahSews are two asterisk blocks.  This was the first time I have ever made anything like this.  I love that she provides links to tutorials for the blocks that she wants made.  The commitment for the number of blocks you make is completely up to you...which I LOVE.  She will complete the quilt and then send it to the home of the foster child.  They will keep this quilt.... forever.

This is the first asterisk block that I made.  Cute but kinda boring.  It did give me an opportunity to test my skills...or should I say to follow directions and overall, I am happy with the outcome.  But since I committed to making two blocks, I decided to jazz it up a bit.  But if you want to know the real story.....lol... here it is.  I made the second just like the first only in different colors.  When I went to square it up I wasn't even close to the 12-1/2" block size.... so I thought hmmmmm, how do I fix this?... Wonkiness!!  It fixes everything! So I offset the asterisk and added the grey border on two sides...a sweet look and by my initial calculations, it should have measured the correct size at that point.  But alas, it did not.  So what is a girl to do?  That's right... add another border!  Cut it big and then trim  it down afterwards!  No more  precision cutting and sewing for me!  Just like Eleanor Burns.... just trim it and toss it over your shoulder and sew some more..trim, toss, sew...that is my new sewing motto


Don't you love it!!!!!  I do!

If you would like to see the finished quilt from the first Quilt For Kids that I participated in just click here.  The blocks I made are here..but they look like the rest. The quilt is sooo cool.  Great for a boy.

Happy Sunday Everyone!!!!